Showing posts with label Daughter and me. Show all posts

Tuesday, July 15, 2014

Lunch mat

After a break, I am back... to share our crafty works...we enjoyed our summer holidays at my native. After a long time, I spent one full month at my mom's place. The kids were very happy, as they spend their holidays with their cousins.. they were super exited to see their newborn cousin. I made a small booties for him, will share it in the next post. Now back to routine and there will more updates here.

 This is what I made after holidays... Lunch mat for my daughter. It has two rooms for spoon and fork.


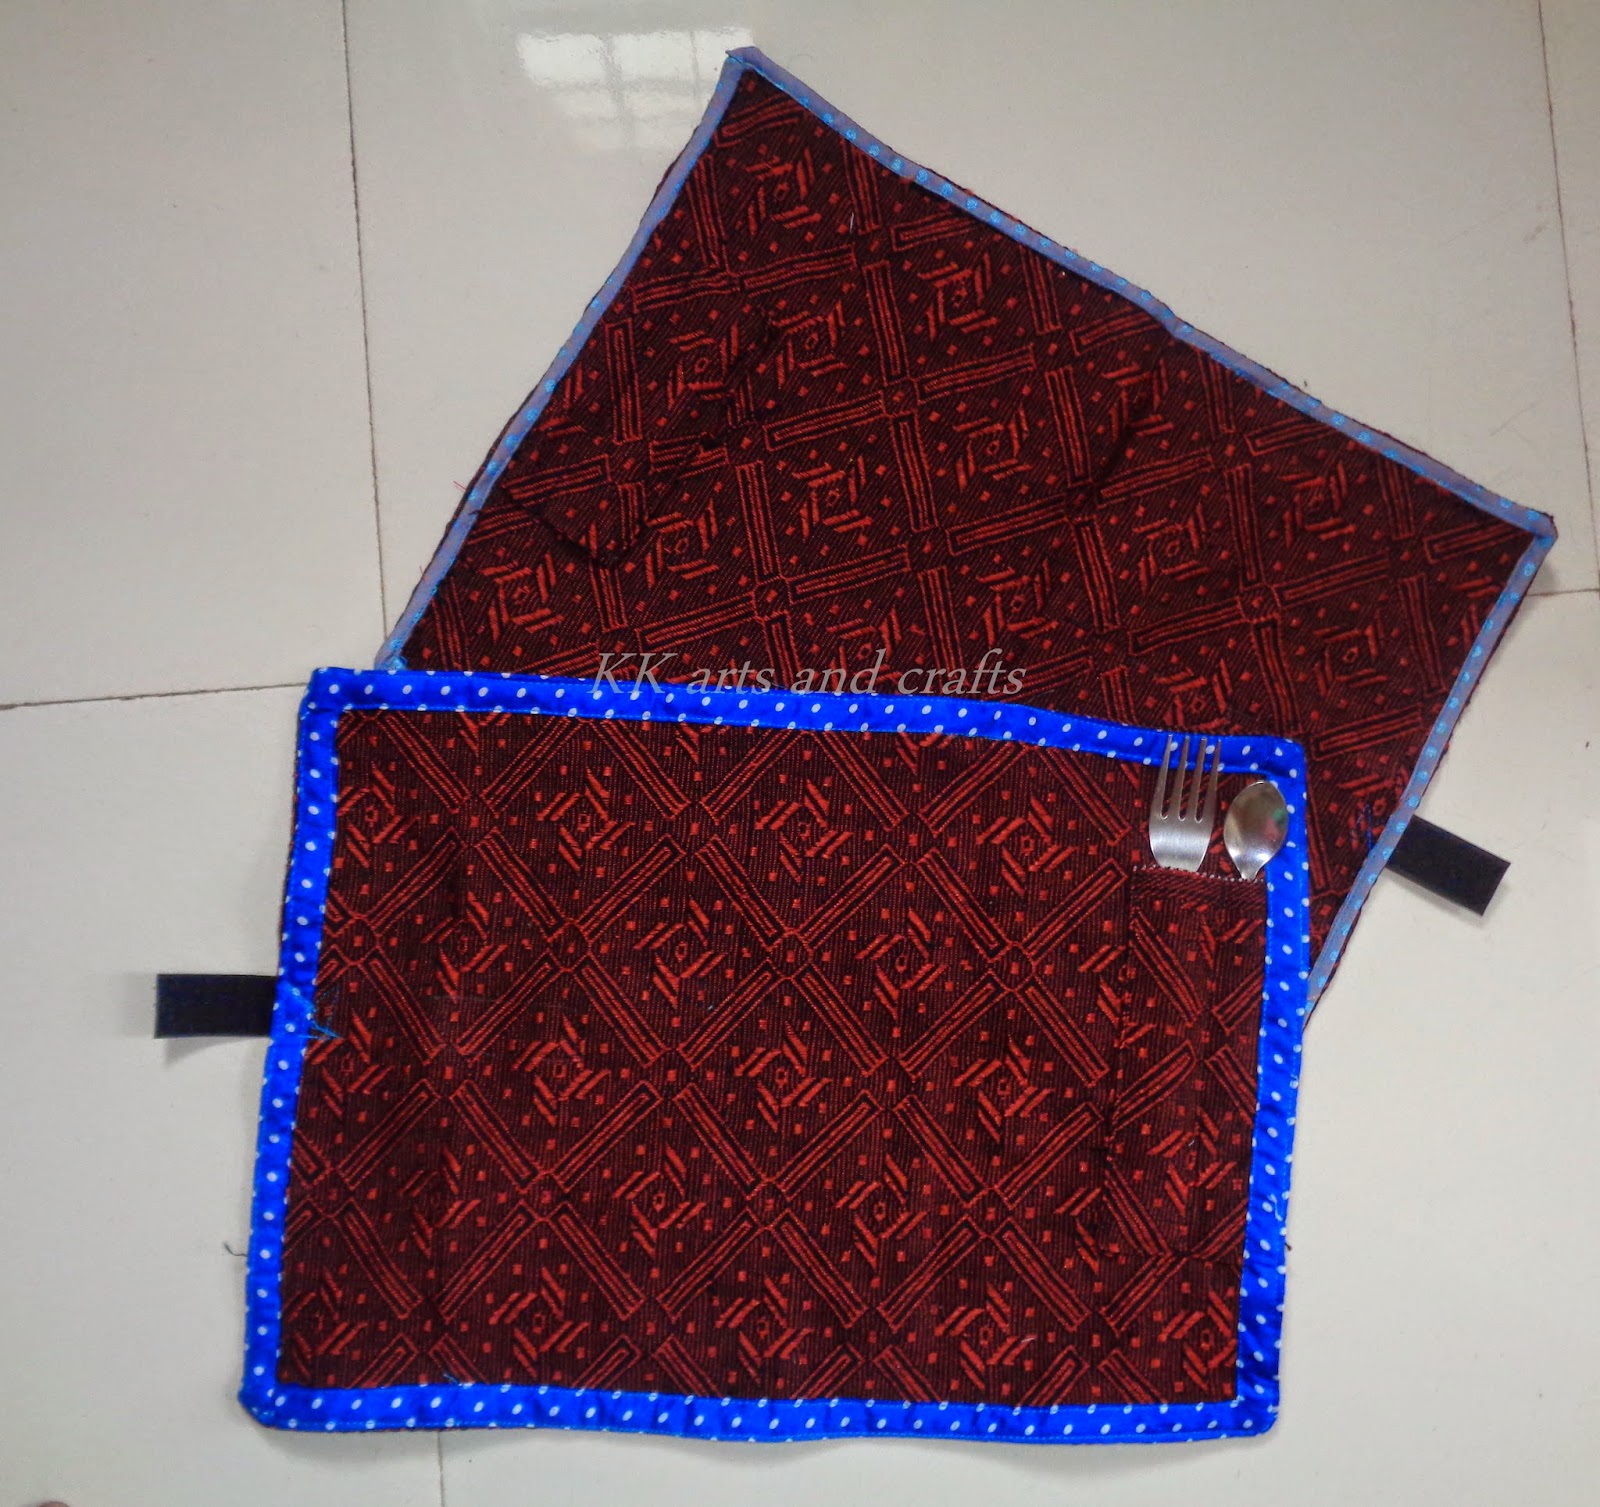
    We can roll and secure it using Velcro. Compact and fix well in the lunch bag keeping the spoon and fork safe. My daughter also loves this...

Note: Linking this  to Round tuit

Thursday, January 6, 2011

Do it yourself - Utility box

Again it is a box similar to thread box, but with some
 compartments...


1. You will need  a box ( I have used shoo box), 
some waste card boards, white gum.


2. If the corners are weak, secure it with cello tape.

3. Measure the height and width of the box and cut the
 card board such that
height=height of the box + 1 or 2 extra inches to paste at the bottom
width= width of the box


4. Just scratch along the line with scissors and fold it as shown.


5. Then cut the card board as shown.


6. Then fold the pieces back and front alternatively as shown.


7. Insert this card board in to the box and paste it. You can mark
the line where to fix it.


Need not worry much if it does not fits, just insert the card board into the box, if it does not fits then you can trim along the sides
and then check it again.

8. You can fix as many as you wish to make the rooms...
I have used here three.


9. Let it dry and paste the color papers. I have used collage method to
paste the papers. You can see it here .


Then, arrange your things as you wish...
I using this box to store my daughter's socks, kerchiefs,
hand towel, Id card....


Note:

  • If you want the compartments to be more strong then you can
paste the sides also, for this you should take extra inches in the width and fold it and paste as the bottom.


  •  You can also use the  papers from the magazines instead of color papers.
Linking...


Organize and Decorate Everything


The DIY Show Off

Thursday, November 25, 2010

Jupiter -For planets day

        This is  for the planets day in my daugter's school. I googled for the colors of  jupiter. I don't know whether it is perfect but somehow I managed to finish it. I used dabble method to make the effects of spots in the surface of jupiter. The colors used are fabric colors brown, orange, fresh tint, prussian blue and black.I am not much satisfied with the picture. I tried to show some depth by adding black color... I might have reduced it...but still happy I prepared it myself for my daughter and I am learning something through it.


          I came to know a lot about jupiter while collecting informations to make this chart. One interesting factor is that jupiter is the planet with largest number of moons ...ie 63 moons.
 

Just have a look.... this is what my daughter is practicing for tomorrow's drawing competition.


One more thing, I am taking a short break for 1 month from blogging . I have to prepare for an  examination.....  something what I am going to do after a long time, so my dear friends wish me all success and also have two important family functions falling in this month. I am sure to come back with more and more interesting projects.Thanks you for support and comments, it means a lot to me.

Thursday, November 11, 2010

This little tree is the Queen of the forest


This week  they are celebrating  children's day   in my daughter's school.  This tree costume is for the fancy dress competition . 

 In the top I have used two different shades of brown for the body and sleeve. I painted with fabric colors to make it look like the trunk of the tree.


Then I stitched the top. For the pant I managed with the brown color tracksuit.


The branches and leaves were not that much easy to make. I first made it with a thermocol.


In this I made a mistake, you can notice one side is very thin than the other. when I fix this in her face to check whether it fits, it break down. The thermocol is not very flexible.Then I made the other one with cardboard and chart paper. It will be easy to paint in the chart than the cardboard. So I pasted the chart over the cardboard.


 and painted with fabric colors, outlined it with black.


I also attached a cord behind it, so that it can be  tied  around the head and hands.


update:
I am linking this to Artsy-Craftsy Jan-2011

Saturday, September 4, 2010

Thread box


Last week when I browsing, I found a tutorial for thread stand. I was badly in need of one such, to keep my threads organised. So I thought of trying it . We made a box(reusing a cardboard box) to hold the thread stand because stacking will be easy. Once again it was a fun activity for me and my daughter pasting and painting. This time I taught her dabble painting method. we used small sponge pieces to color the thermocol.


Then comes pasting .Very easy. No need of cutting, just tear it...


paste it...... decoupage.


After drying, give several coats of clear varnish to give a rich look and it also extend the life of the box.
Now, the box is ready to use


Before I stored the threads like this


and now.....


You can see the tutorial for thread stand here.
Jaleela kamal ,Thank you for sharing.

Note:
Linking to the parties here

Friday, August 20, 2010

Fruits & Vegtables

Last week, the weekend home work for my daughter is to stick five fruits and vegetables. My daughter is very much interested in cutting, pasting and painting. So instead of getting a chart and using the pictures, I thought of making it ourselves, by which I can make her happy. And we made this....


and this...


Really she was happy while doing this and she was also very proud of this. We used hand made papers. For some fruits we didn't get the accurate color paper, so we made it white color hand made paper and painted  using fabric colors and crayons.


I am linking this to the parties here